- For information on installing the supply cable, the power supply and the controller, refer to the installation manual.
- Before the modules are installed, their functionality has to be checked.
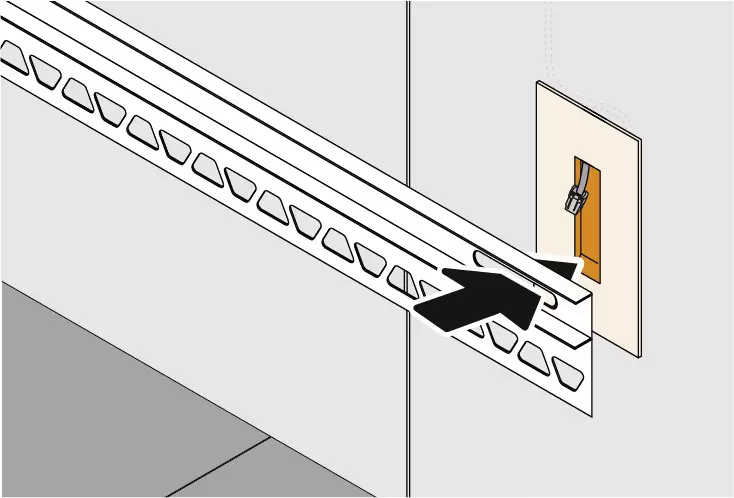
- In advance, the supply cable has to be positioned as appropriate for the cable opening in the attachment profile.
- The LED strip has to be removed from the profile before the profile is installed. Please refer to the respective data sheets for installation details of the individual profiles. During installation of the profile, the bushing of the connecting cable has to be routed through the cable opening of the attachment profile from the rear.
- If used in a wet zone, the IP-protected LED strip has to be shortened at an angle of 45° at the marked positions. The Schlüter-PROCUT special cutting tool is particularly suitable for this purpose. Make sure that the LED strip has been separated from the power supply before working on it.
The cut surface of the LED strip has to be waterproofed with the supplied silicone sealing caps and special glue. First, apply an adequate amount of adhesive to the bonding surfaces of the silicone sealing cap. Subsequently, insert the silicone sealing cap into the LED strip and press it in position for approx. 30 seconds. Check whether the end cap is properly connected to the LED strip. Remove excess adhesive with a cloth. After a curing period of approx. 30 minutes, the silicone end cap is firmly glued in place. The LED strip has been sealed and can now be used.
- After the profiles have been installed, the LED strip is connected to the supply cable by means of the plug-and-play connection and is carefully pressed into the attachment profile.
Installation in wet zones
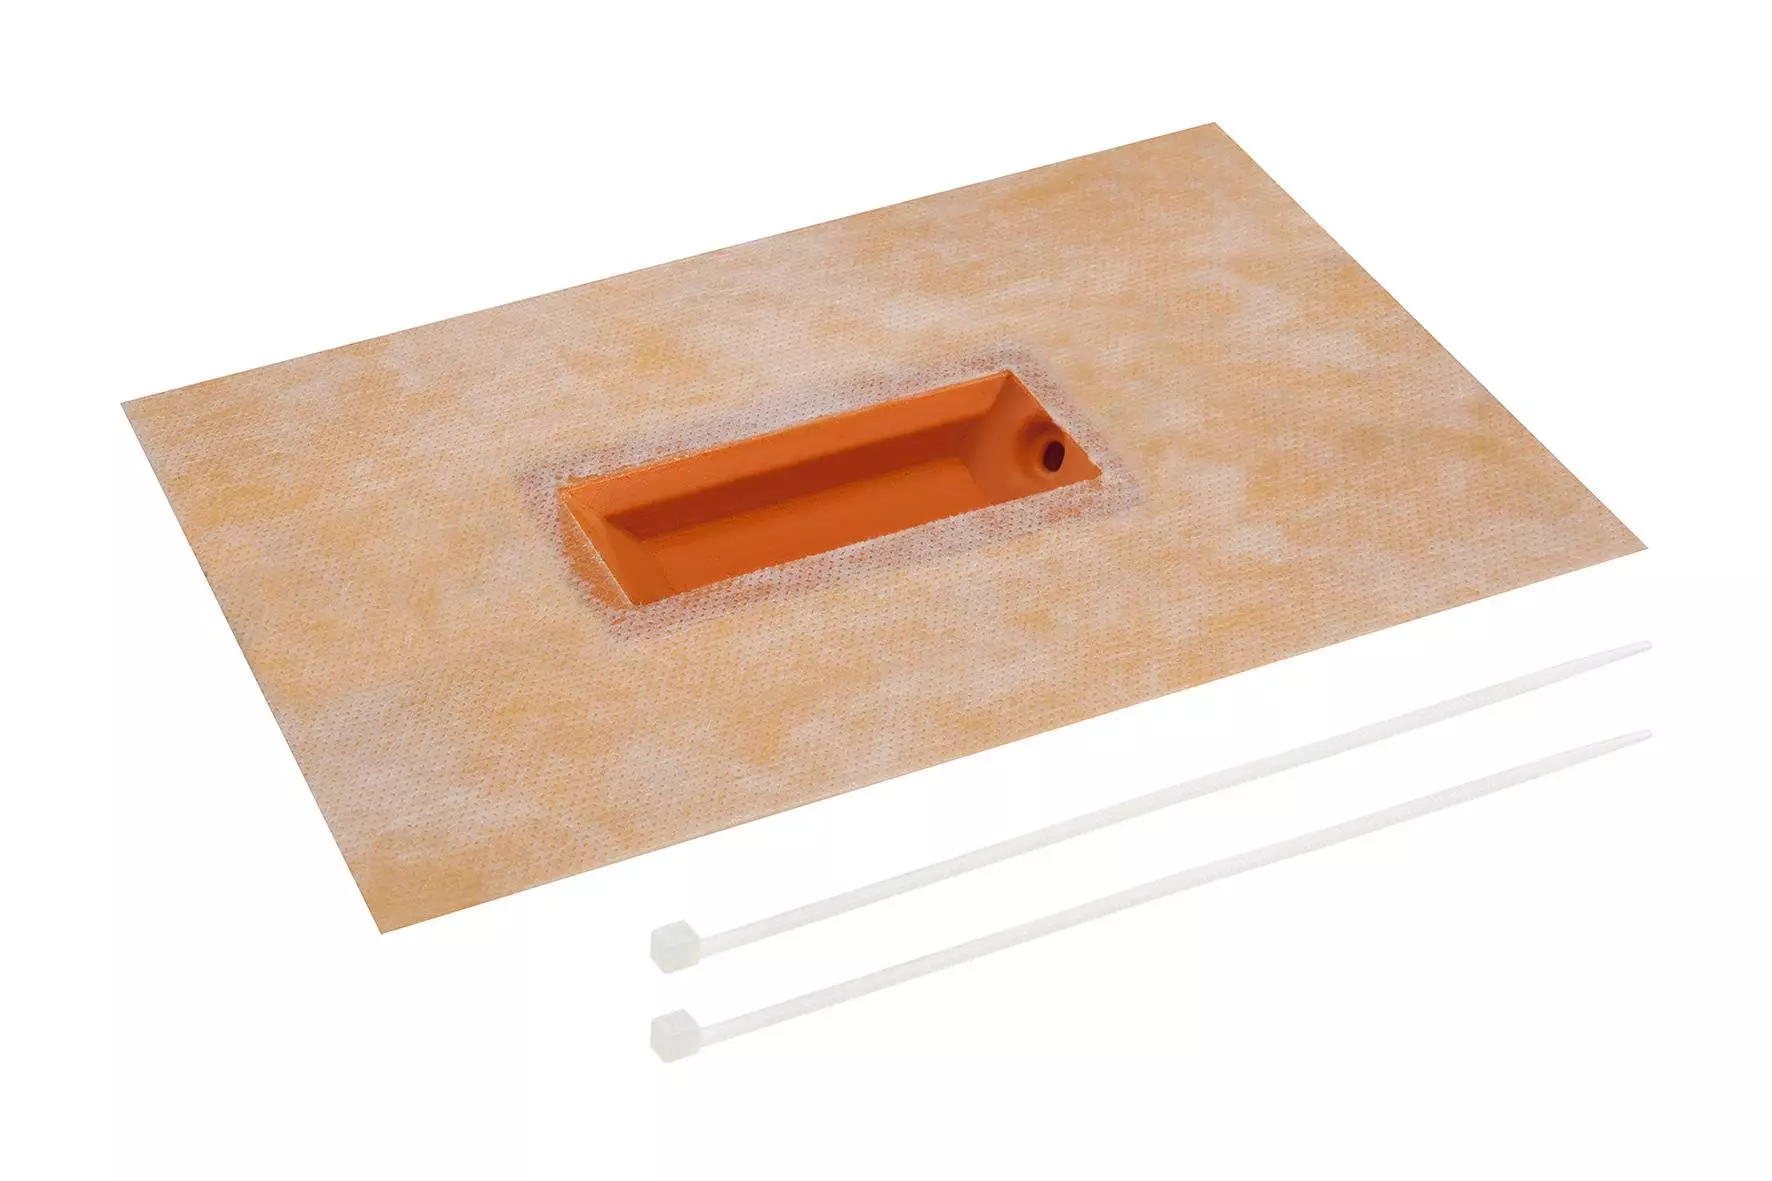
The modules can be installed in areas subject to wet conditions (e.g. showers) by using the Schlüter-LIPROTEC-PZH hollow wall box with attached Schlüter-KERDI waterproofing collar. It creates a hollow space for plug connections, to reversibly install the plug-and-play LED modules. To insert the hollow wall box, a cutout with a size of 40 x 120 mm and a depth of min. 20 mm has to be made in the wall. The connection cable has to be routed through the cable duct. Make sure that the heat shrink tube on the connection cable ends up in the area with the sealing collar. The cable conduit is fastened crosswise with two cable ties included in the scope of supply, and thus sealed. Subsequently the cable ties have to be shortened. The hollow wall box is placed in the cutout produced and the sealing collar is sealed on the bonded waterproofing with Schlüter-KERDI-COLL-L. The self-adhesive KERDI collar has to be placed in such a way that the hollow wall box is sealed on all sides. Make an opening only where the cable opening of the attachment profile will later be positioned.
Note: In high-moisture areas, position the hollow wall box in such a way that water cannot permanently accumulate in it.