
We're here to help with your construction project
Request free information material now and receive recommendations for trade and also retail partners!
How does the warmth reach your feet? Which screed and which floor covering are the most suitable? All the important information about construction, screed and flooring summarised in a compact format.

A striking first impression starts from the bottom up: Insulation keeps the heat where it belongs – inside the room. The heating layer distributes the heat quickly and evenly. The screed transfers it directly to the floor covering. And then what? Tiles or natural stone slabs are best, as they quickly transfer the heat upwards. Now every step becomes a moment of well-being – from the first moment you switch on the floor heating system to the optimum indoor temperature.
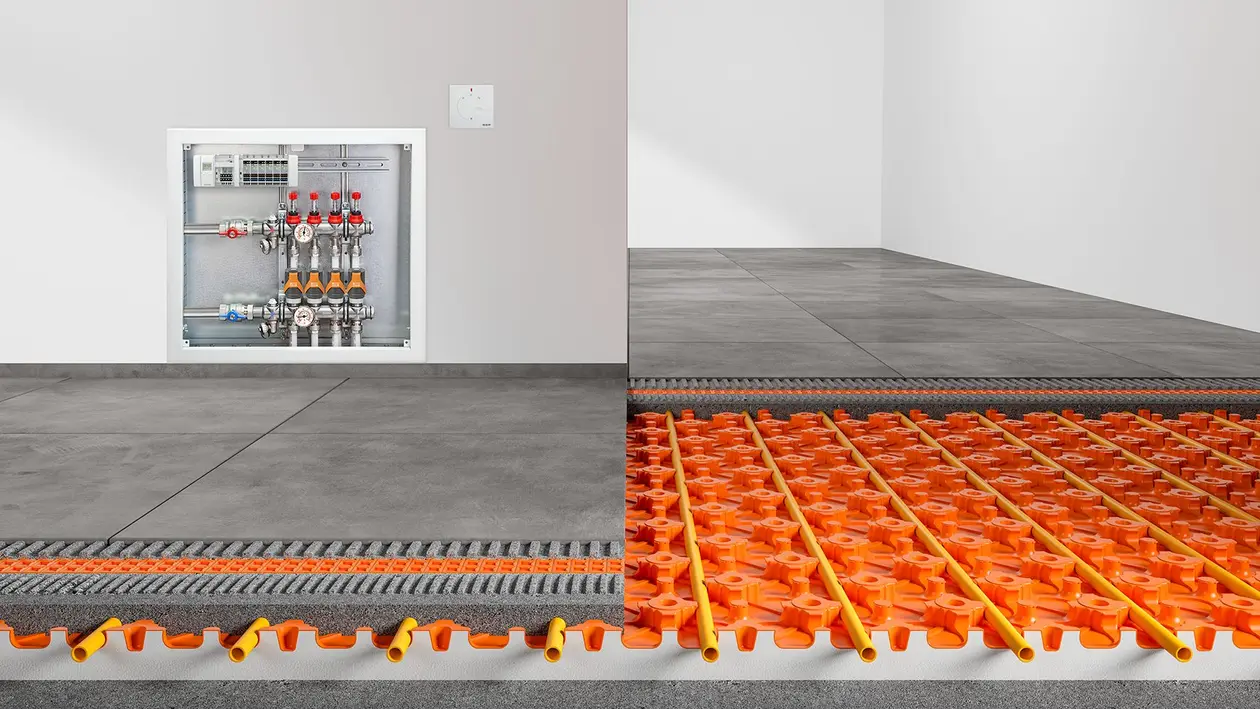
A floor heating system can only reach its full potential if the floor structure is right. At the very bottom, a high-quality insulation layer makes sure that the heat doesn't escape downwards. This is followed by the heating layer – whether it uses water-bearing pipes or electric heating cables – that should be connected to the screed to cover as much surface area as possible. Flowing or cement screed is particularly well suited because it absorbs the heat uniformly and then dissipates it.
At the top, the floor covering determines how efficient the heating system is: Tiles and natural stone slabs are particularly well suited thanks to their excellent heat conduction and heat storage properties. But special laminate and parquet flooring can also be used, even if they react more slowly. On the other hand, thick carpets or heavily insulating floor coverings slow the heating down. The underlying principle is quite simple: Insulate well at the bottom, heat efficiently in the middle and choose a heat-conductive covering on top – this provides a structure that ensures rapid heat and maximum comfort.

When planning a floor heating system, a common question is: Which floor covering is the most suitable? The answer is simple – even though it really depends on your own ideas. What matters most is that the floor conducts and stores heat well. Materials such as tiles, natural stone or thin vinyl flooring are the most popular choices here. They quickly dissipate heat into the room and maintain a comfortable, constant indoor temperature – whether in the bathroom, living room or home office.
But even wood lovers don't have to miss out! Modern parquet and laminate flooring is available in special versions optimised for floor heating systems. The important thing here is to pay attention to the maximum material thickness and the appropriate installation method – this keeps the heating output efficient and the floor nice and stable. Carpet, on the other hand, is only suitable to a limited extent: It provides excellent insulation and slows down the transfer of heat.

The thickness of the screed over a floor heating system is the real key to comfort and efficiency – and it depends greatly on whether you are building a new home or renovating an existing building. Planning correctly from the outset ensures you get a heating system that responds quickly, heats uniformly and gives you many years of enjoyment.
A new construction project is usually fitted with a floating screed. It lies on a layer of insulation and a separating layer, so that neither sound nor cold from the substrate can penetrate into the room. It is important that the heating pipes are fully enclosed by the screed – a bit thicker for cement screed, a bit thinner for anhydrite screed. This ensures consistently pleasant heating, a stable floor and a long service life.
In renovation projects, the starting point is often even trickier: obstructions such as doors, stairs or floor-mounted installations set clear limits. Every millimetre counts. And that's where special thin-layer systems or dry screed elements come into play, as they work with a covering of just 20 to 35 mm. This keeps the assembly height low – and the heat still comes into the room quickly and evenly.
Cement screed is the classic – robust, durable and completely resistant to moisture. It can be installed in almost any room, from the living room to the basement or bathroom. Those who opt for cement screed will need to be patient, however because the drying time is considerably longer than with other types of flooring, taking four to six weeks before the floor covering can be laid.
Calcium sulphate screed (anhydrite screed) excels with its outstanding thermal conductivity and smooth surface that provide ideal preconditions for floor coverings. It dries more quickly than cement screed and has a low tendency to crack. That said, it does not cope well with moisture, so it is not a good choice for areas that are constantly exposed to water.
Quick-setting screed is the choice for those who do not want to lose any time. Often ready for use after just 24 hours, it combines good heat conduction with swift construction progress. It is more expensive and should definitely be left to a professional to install.
Flowing screed ensures perfect flatness because it is self-levelling and fully encloses the heating pipes – a plus for heat transfer. It is most commonly based on calcium sulphate and is therefore sensitive to moisture. The installation also requires special equipment.
Dry screed is immediately ready for use, does not need to dry out and its low weight makes it ideal for renovations. Its thermal conductivity is lower than that of wet screeds, however, and it can react more sensitively to high loads.
Warmth you can feel – and footsteps that stay quiet. That is the purpose of any floor heating system. And for that to work, it needs the right sound insulation. Basically, it ensures that footsteps are muffled and sound is not transmitted to the rooms below.
In the case of a floor heating system, however, it must not block the distribution of heat. Materials such as special EPS insulation, foam, mineral fibre board or cork have proven themselves. They combine good insulation values with high thermal conductivity.
When installing, ensure that the insulation is level and stable. Uneven surfaces can reduce the heating output and lead to noise later. Often, the insulation is laid directly under the heating pipes or offered as a composite panel that combines the heat conduction panel and sound insulation.
Another important factor is the thickness of the insulation. Too thin? The soundproofing suffers. Too thick? The heat output drops. It is advisable to use products that are specifically designed for floor heating systems – they are optimised to achieve the right balance between sound insulation and heat conducting properties.
This is exemplified by the Schlüter-BEKOTEC-EN-FI studded screed panel with integrated, 30 mm thick thermal and sound insulation in EPS. This sound insulation effectively reduces impact sound by up to 28 decibels. It also ensures that the heat from the heating pipes is directed upwards and thus efficiently into the space.
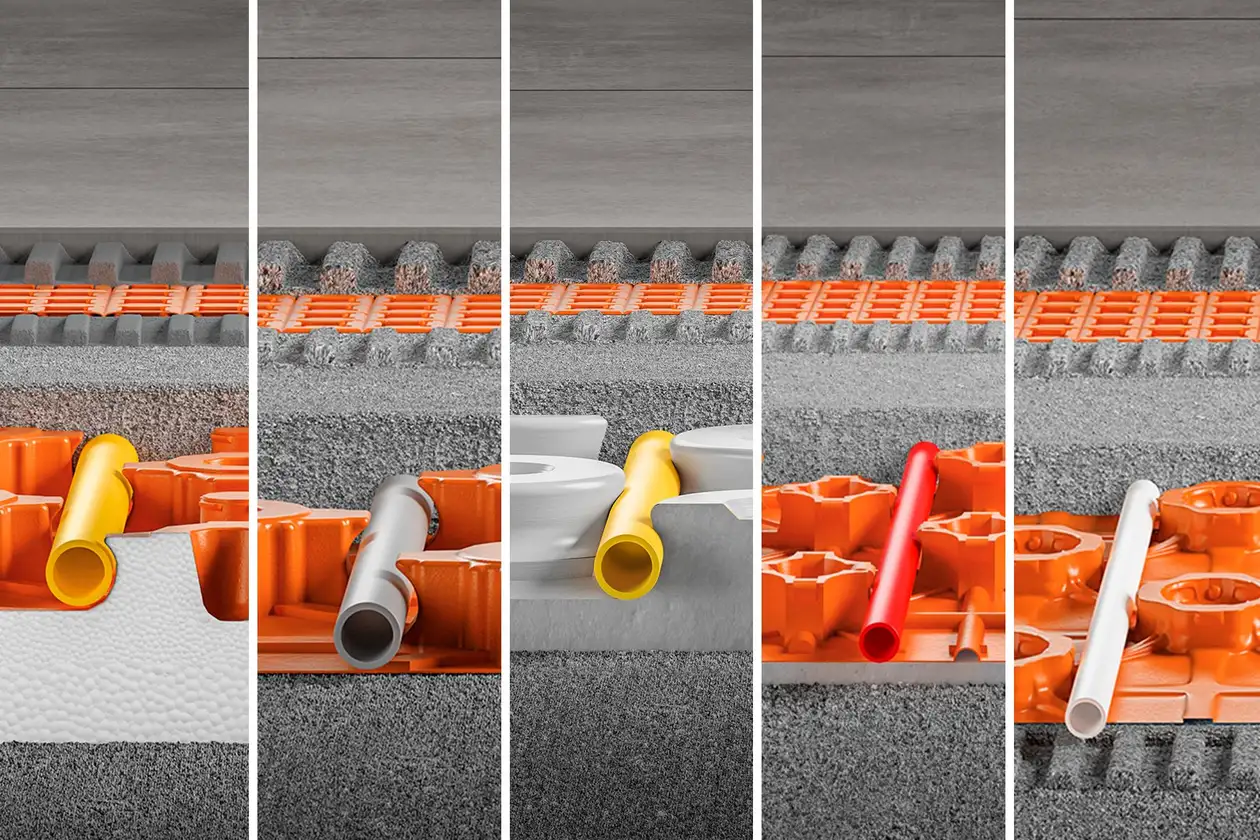
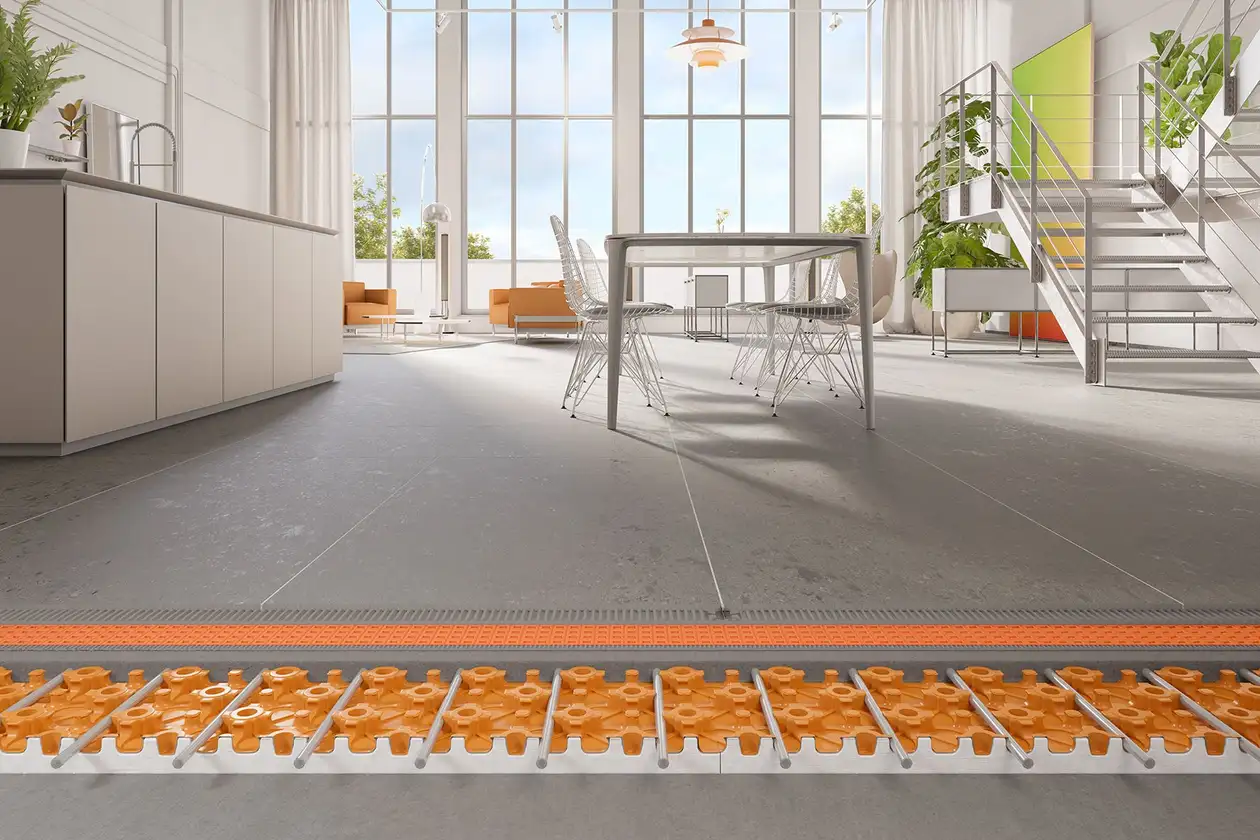
Schlüter-BEKOTEC-THERM is the floor heating system that adapts to your new construction or renovation project. It is based on clever studded panels, available in five assembly heights, with heat or sound insulation, self-adhesive or classic. That keeps things flexible – no matter what type of flooring you're laying – ceramic, natural stone slabs or other coverings.
Installation is straightforward: The heating pipes are simply inserted perfectly between the studs of the studded screed panel, then a screed covering of 8 mm or more is sufficient. Are there stresses in the screed? No problem – The clever studded pattern absorbs them automatically. No expansion joints or trowel cuts are necessary.
At the same time, BEKOTEC-THERM considerably shortens the construction time: Thanks to minimal use of material and no time-consuming screed curing, the floor covering can be laid as soon as the screed is able to bear weight.
Note: Please observe the technical documentation!


