Installation in Schlüter-KERDI-BOARD:
1. Make a cut-out by positioning and precisely marking the external dimensions of the niche and the frame. Only the top layer of the frame needs to be cut out. Completely cut out the wall for the recess in the niche.
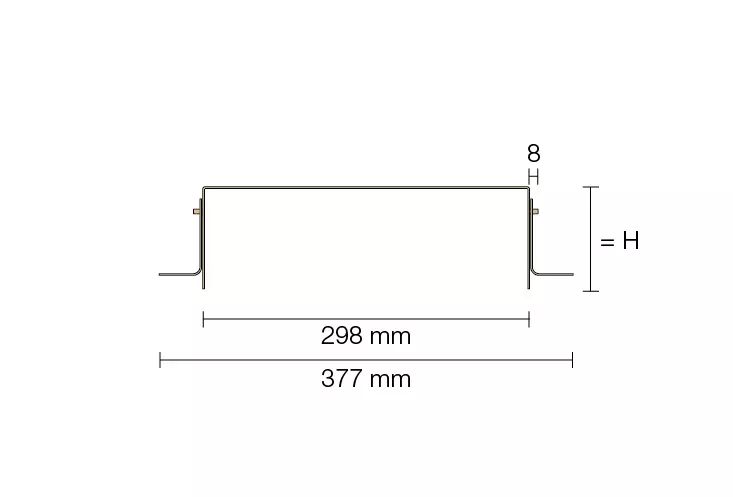
2. Determination of the above dimension. Adjustment range can be selected from 3 mm to 55 mm. Use the 5 mm spacing grid when using the knurled nut as shown. Infinitely variable adjustment of the distance by turning the knurled nut.
3. Apply KERDI-FIX to the recess to bond the spacers, then insert and align the spacers.
4. Apply KERDI-FIX to the spacers to bond the frame, then insert and align the frame.
Note: For a proper installation, we recommend protecting the outer surfaces of the niche with masking tape.
5. Use KERDI-FIX to completely fill the joint between the niche and the frame.
6. The KERDI sealing collar is glued to the frame and the adjacent waterproofing with KERDI-COLL-L. Remove the masking tape. Fresh residue of KERDI-FIX can be removed with spray oil (such as WD-40).
If the studwork is installed but no plasterboard fitted:
1. Create a studwork frame for the niche body to sit in:
- Niche A: Stud frame should measure 320 x 305 mm
- Niche B: Stud frame should measure 320 x 605 mm
- Niche C: Stud frame should measure 320 x 1205 mm
2. Place the niche frame on to a piece of plasterboard and cut around the outside of the frame.
3. Fix the plasterboard with the hole cut in it (step 2) to the studwork so the hole and studwork frame align.
4. Using the supplied tube of KERDI-FIX, glue the spacers to the studwork frame.
5. Using the piece of plasterboard cut out in step 2 and the wall tile that will be used (plus a small piece of DITRA-PS to mimic a bed of tile adhesive) as a guide, use the adjustable nuts on the niche body to slide it backwards or forwards until it is set to the required depth - either flush with the surface of the tiled wall or protruding out from the tiled wall - and tighten the nuts.
6. Apply KERDI-FIX to the surface of the spacers.
7. Slot the niche into the opening, gently pushing the frame on to the KERDI-FIX on the surface of the spacers.
8. Use KERDI-FIX to completely fill the joint between the niche body and the niche frame.
9. Using KERDI-COLL-L-185 adhere the KERDI-collar to the niche frame and surrounding plasterboard, creating a waterproof seal.

![Video Schluter®-DESIGN-NICHE | Installation Video [without subtitles]](https://i.ytimg.com/vi/tEyNKz6UXSg/mqdefault.jpg)


