Schlüter-KERDI-SHOWER-T  Sloped tray for intermediate point drainage

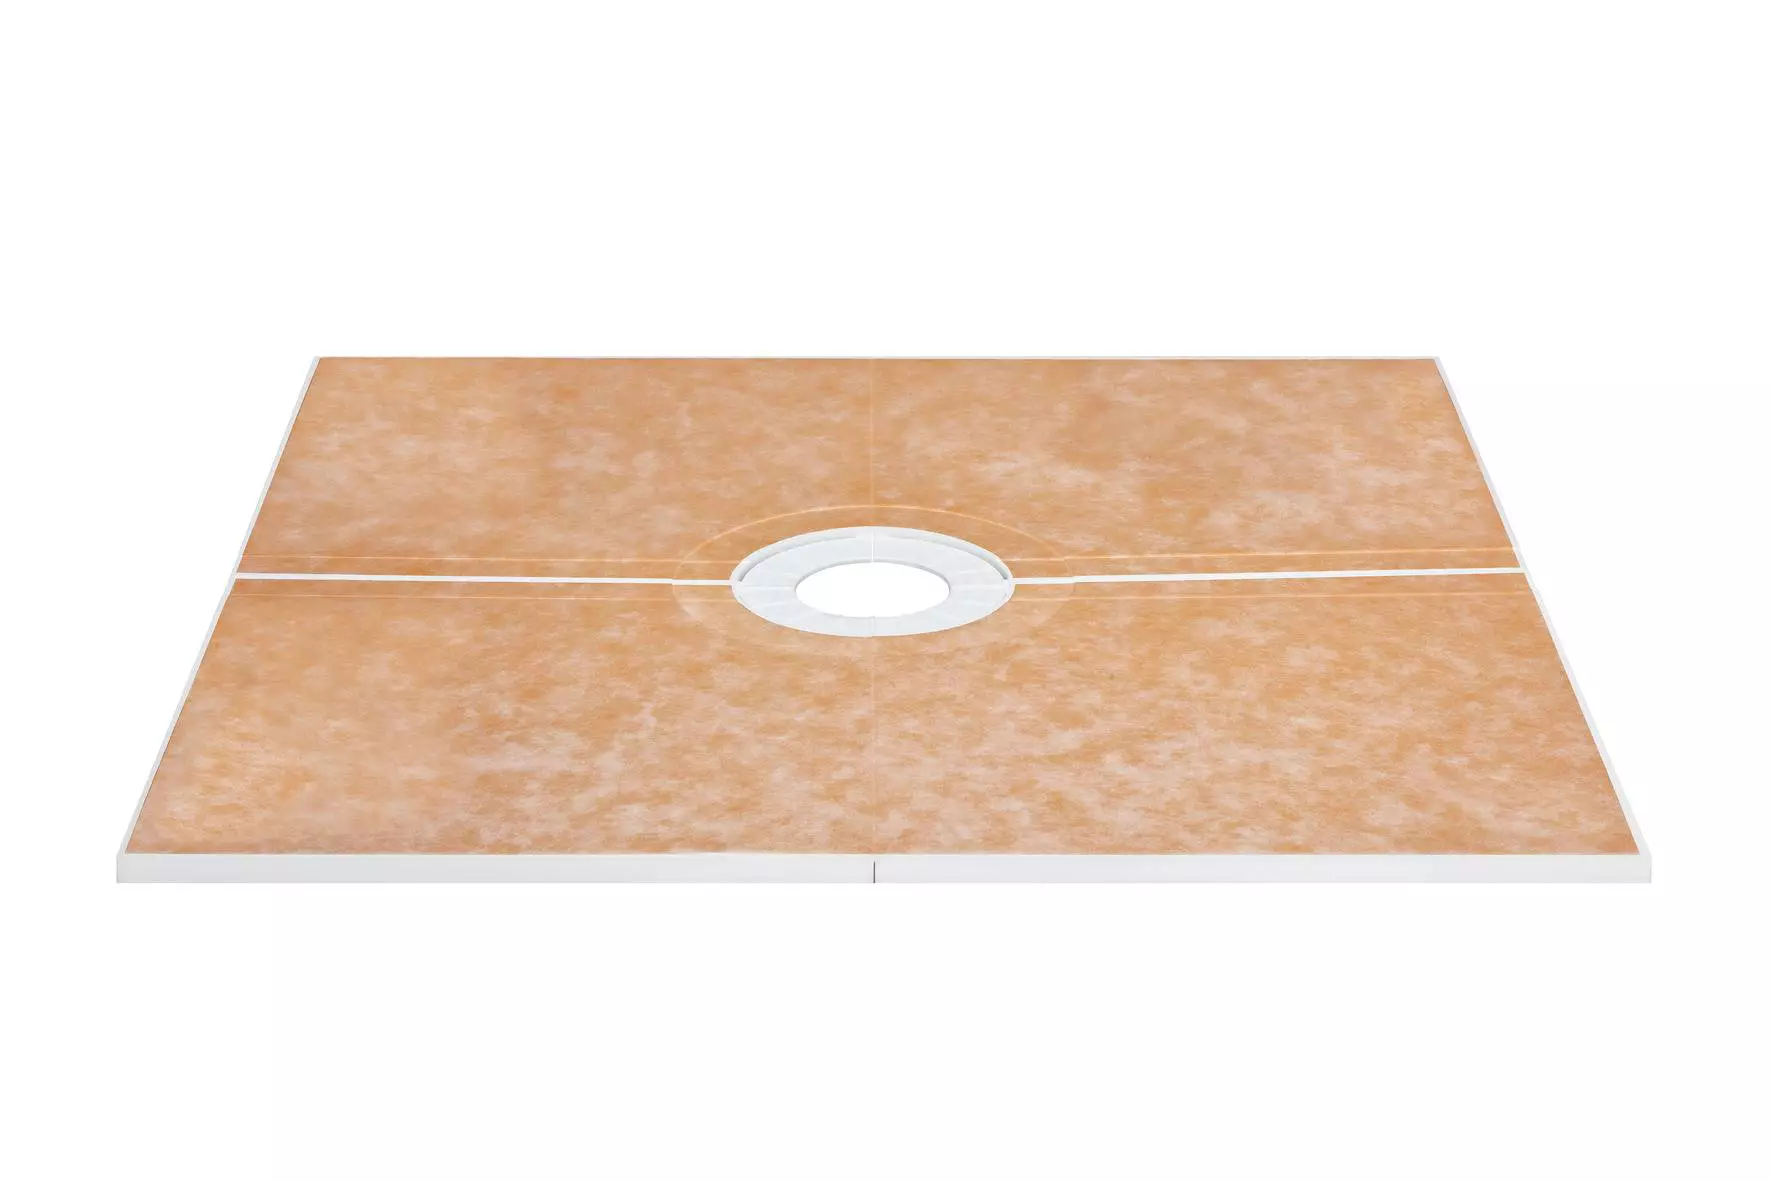
Quick and reliable creation of a necessary slope for the appropriate drainage of barrier-free showers – it's easy with our KERDI-SHOWER polystyrene sloped trays. The KERDI-SHOWER-T variant is suitable in combination with the centrally positioned KERDI-DRAIN point drainage. In addition to preparing the floor drain, you also need a levelling layer as a load-bearing substrate. The ready-to-tile, sloped trays are available in different dimensions and can also be individually cut to size with a utility knife thanks to pre-marked cutting grooves.

Note: The front of our sloped tray features the tried-and-tested and reliable KERDI waterproofing membrane.

Where to buy
Product image KERDI-SHOWER-T 1©Schlüter-Systems KG
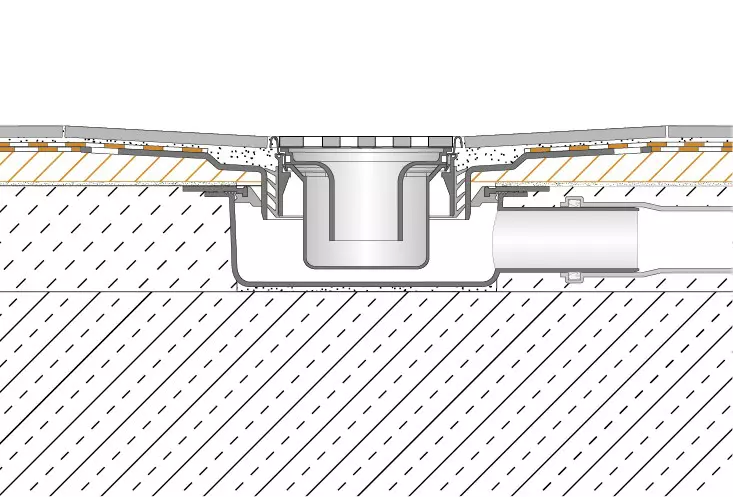
Cross-section drawing KERDI-SHOWER-T 1©Schlüter-Systems KG
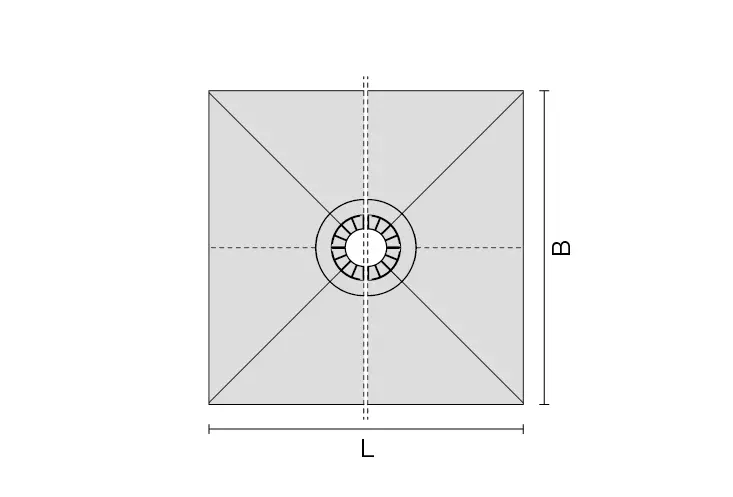
Cross-section drawing KERDI-SHOWER-T 2©Schlüter-Systems KG
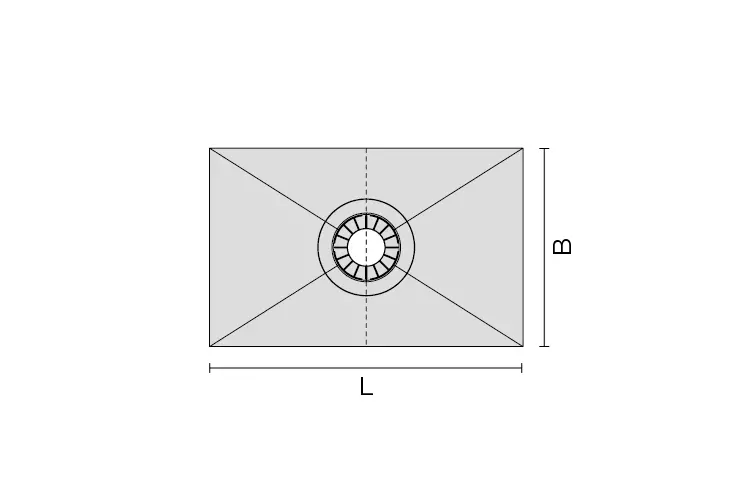
Cross-section drawing KERDI-SHOWER-T 3©Schlüter-Systems KG
zoom_out_map search
Product image KERDI-SHOWER-T 1
Cross-section drawing KERDI-SHOWER-T 1
Cross-section drawing KERDI-SHOWER-T 2
Cross-section drawing KERDI-SHOWER-T 3

General product information

What this product does

Schlüter-KERDI-SHOWER is a modular system for building floor-level showers with ceramic tiles.

The sloped trays are available in various dimensions for centre and off-centre placement of the matching floor drain system. The associated floor drain system Schlüter-KERDI-DRAIN-BASE can be purchased as a set. Depending on the local conditions of the construction site, other variants of Schlüter-KERDI-DRAIN may be suitable as well. Various sets of the bonded waterproofing membrane Schlüter-KERDI are available for waterproofing the wall areas.

The shower trays feature the necessary slope for the drainage points.

Smaller dimensions and variations can easily be cut to size with a utility knife. The side ratio and the position of the drainage point must be observed.

The KERDI-DRAIN variants meet a wide range of drainage requirements, including large drain capacity and vertical or horizontal drainage.

The available tray dimensions for a centre drain include:

  • 91.5 x 91.5 cm
  • 91.5 x 122 cm
  • 96.5 x 81 cm
  • 96.5 x 152.5 cm
  • 101.5 x 101.5 cm
  • 122 x 122 cm
  • 122 x 152.5 cm
  • 122 x 183 cm
  • 152.5 x 152.5 cm
  • 183 x 183 cm

The available tray dimensions for an off-centre drain include:

  • 96.5 x 152.5 cm
  • 96.5 x 96.5 cm (corner drain, pentagonal)

How to install this product

  1. Position the drain body on the substrate according to the selected sloped tray and connect it to the existing drainage system, using a drain pipe cut to the appropriate size.

    If necessary, use the supplied adapter (DN 40 to DN 50) for connecting. Perform a water tightness test.

  2. Properly install the levelling layer (compressive strength >= 0.3 N/mm²) on the weight-bearing substrate. Make sure the entire drain body and the drainage pipe are fully encased for complete load transfer. Use the upper edge of the respective floor drain as a levelling gauge and make sure it is flush with the upper edge of the levelling layer. If using bound fillings, it may be advisable to apply spackle prior to installing the tray, depending on the condition of the substrate. The respective manufacturer’s specifications must be observed.

    Note: In case of impact sound insulation requirements, the load-transferring levelling layer must be installed over the sound insulation panel Schlüter-KERDI-LINE-SR and sealed with a suitable edge insulation strip along the perimeter.

    The maximum compressive strength CP4 (≤ 4 mm) must be taken into consideration to select a suitable insulation material.

  3. The sloped tray is then fully embedded on a sufficiently load-bearing levelling layer, using a dry-setting thin-bed mortar.

    Carefully ensure that the abutting joints of the sloped tray do not cover the pipe channel of the drainage pipe.

  4. Insert the bonding flange into the precisely cut opening of the drain body so that the adhesive flange is flush with the surface of the sloped tray. For embedding, apply thin-bed mortar below the adhesive flange beforehand.
  5. To adhere the KERDI collar – which is included in the scope of supply for KERDI-DRAIN – use a 3 x 3 mm or 4 x 4 mm notched trowel to apply KERDI-COLL-L to the bonding flange and the waterproofing collar of the sloped tray to fully embed the KERDI collar. Firmly push the collar in place with the smooth side of the notched trowel or by drawing a smoothing trowel over the KERDI collar at an angle under pressure. Make sure there are no air bubbles. The curing time of the adhesive must be observed.
  6. Fully embed the waterproofing membrane KERDI 200 for waterproofing the wall areas. Adhere the sealing band KERDI-KEBA and pre-fabricated Schlüter-KERECK corner pieces to the abutting membrane joints in the installation area as well as along the wall/floor transitions with KERDI-COLL-L. Use the matching KERDI pipe collars for waterproofing pipe penetrations.
    Further instructions can be found in the corresponding product data sheets, 8.1 Schlüter-KERDI and 8.4 Schlüter-KERDI-COLL-L.

    Note:
    If the wall areas are covered with Schlüter-KERDI-BOARD, the same material can be used for waterproofing the walls (see product data sheet 12.1 Schlüter-KERDI-BOARD). Adhere KERDI-KEBA and KERDI-KERECK with KERDI-COLL-L to abutting joints and corner areas for waterproofing.

  7. Tiles can be installed in the thin-set method as soon the bonded waterproofing has been completed as described above. No curing time is required.
  8. To install the tiles, apply the dry setting thin-bed mortar directly on the KERDI collar and then fully embed the tiles in the adhesive. The floor area can withstand normal foot traffic, regardless of the tile dimensions. An additional load distribution layer or larger tile formats should be installed if higher traffic loads, e.g. from wheelchair use, are expected.

    Note:
    System-certified thin-bed mortars must be used in areas that require waterproofing assemblies according to abP (certificate of technical approval) or CE-compliance.

    As part of installing the floor tiles, insert the housing of the drain grate and the integrated odour trap into the bonding flange and align it flush with the surface in accordance with the tile thickness. Place tile adhesive underneath the grate frame.

  9. Other coverings such as coatings, vinyl and similar materials can be installed in principle, but are not described in further detail here and require additional clarification. Please contact us for our recommendations.

The trays already feature the necessary slope for the drainage points. They are precisely customised to accommodate the KERDI-DRAIN bonding flange with adhesive flange.

Depending on the construction situation, the sloped tray can be installed on the corresponding load-bearing substrates (e.g. wooden studs, vertical drain, mortar substrate etc.).

The KERDI collar is pre-adhered to the sloped trays.

For easier handling, the sloped trays are shipped in a folded format.

The sloped trays KERDI-SHOWER-KST 1525 and -KST 1830 comprise 2 parts, which can be connected to form a flush dovetail design. The connecting joint is sealed with KERDI-KEBA and KERDI-COLL-L.

What this product is made from

The sloped tray is made of compression-resistant expanded polystyrene (EPS).

The drain body is made of high-impact resistant polypropylene (PP).

The bonding flange is made of acrylonitrile butadiene styrene (ABS) and features an attachment flange with a fleece-coated surface.

The pre-adhered Schlüter-KERDI collar on the sloped tray is made of soft polyethylene with a special anchoring fleece laminated on the surface for effectively bonding with tile adhesive or adhesive products for other coverings.

The stainless steel grate included in the waterproofing set Schlüter-KERDI-SHOWER-SKB is made of V2A (material 1.4301 = AISI 304).

Material properties and areas of application

The drain body, bonding flange and covers are classified as K3 according to DIN EN 1253, Gullies for buildings. The classification K3 refers to areas without vehicle traffic, e.g. wetrooms in apartments, nursing homes, hotels, schools, and public washroom and shower facilities.

The suitability of a proposed floor drain system must be verified based on the anticipated chemical, mechanical and/or other stresses.

Downloads