Schlüter-QUADEC-MC  Finishing profile made of chrome-plated brass

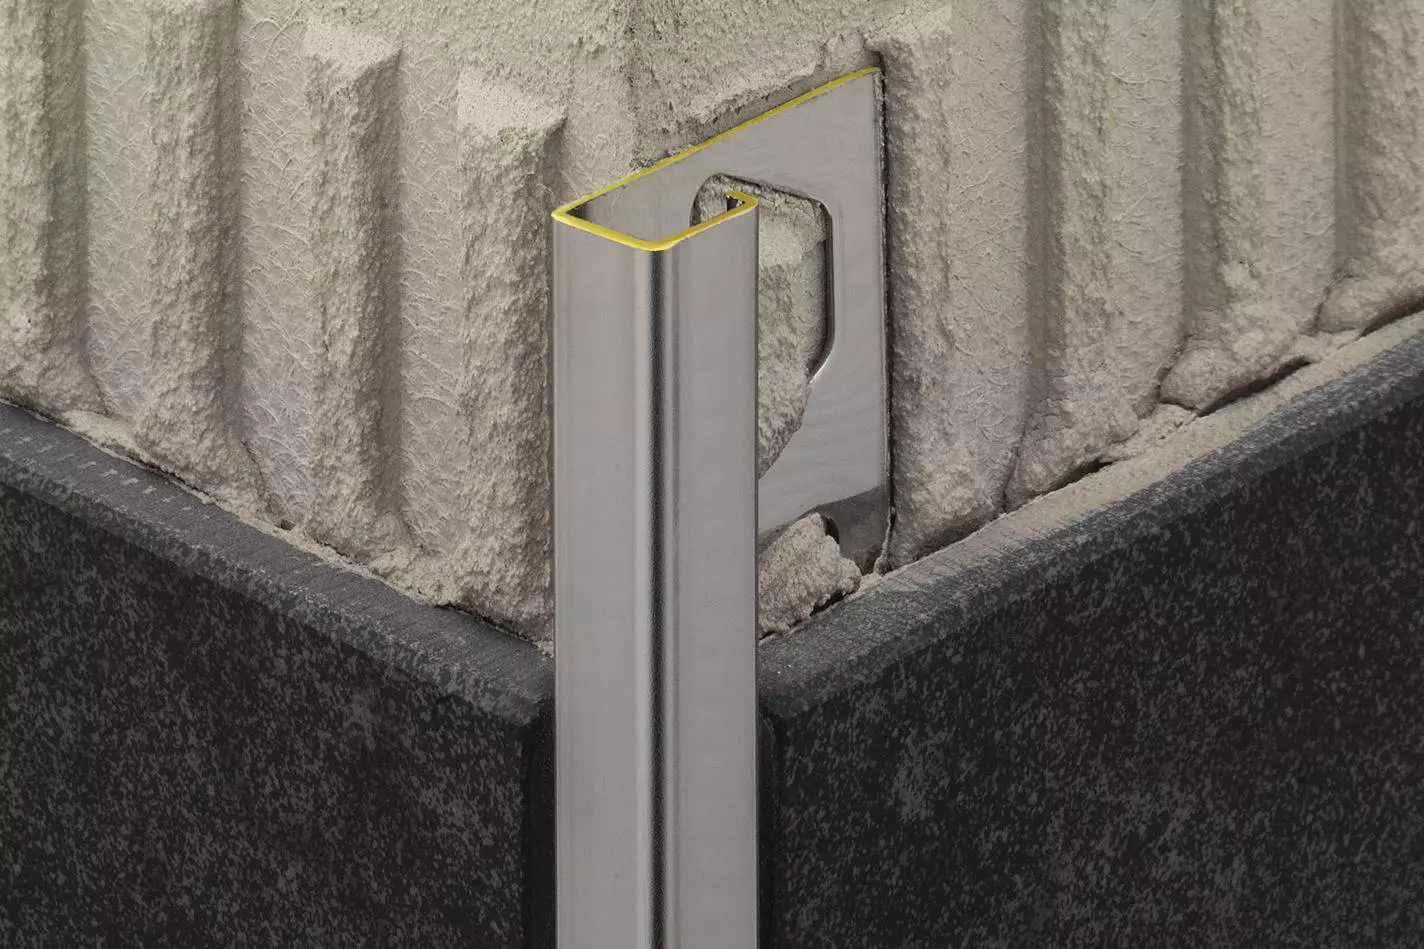
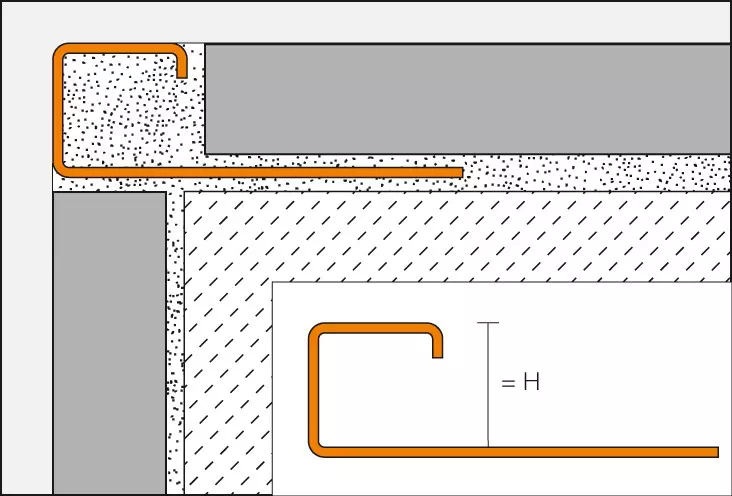
Schlüter-QUADEC-MC is a premium chrome-plated brass finishing profile for external corners and edges of tiled coverings. The visible area of the profile forms a right angled external corner.

In addition to their decorative appearance, the profiles of our QUADEC-MC series are an especially good choice for protecting the edges of tiled coverings.

Matching corner pieces are available for QUADEC-MC profiles to create simple and elegant connections to internal and external corners.

Where to buyData sheet
Product image QUADEC-MC 1©Schlüter-Systems KG
zoom_out_map search

Filter settings

  • 6 mm
  • 8 mm
  • 10 mm
  • 11 mm
  • 12.5 mm
  • 15 mm
  • 2.5 m
  • Brass
  • Chrome plated brass
  • Q 100 MC
    Height
    10 mm
    Length
    2.5 m
    Material
    Brass
    Colour/surface
    Image of undefined
    Chrome plated brass
  • Q 110 MC
    Height
    11 mm
    Length
    2.5 m
    Material
    Brass
    Colour/surface
    Image of undefined
    Chrome plated brass
  • Q 125 MC
    Height
    12.5 mm
    Length
    2.5 m
    Material
    Brass
    Colour/surface
    Image of undefined
    Chrome plated brass
  • Q 150 MC
    Height
    15 mm
    Length
    2.5 m
    Material
    Brass
    Colour/surface
    Image of undefined
    Chrome plated brass
  • Q 60 MC
    Height
    6 mm
    Length
    2.5 m
    Material
    Brass
    Colour/surface
    Image of undefined
    Chrome plated brass
  • Q 80 MC
    Height
    8 mm
    Length
    2.5 m
    Material
    Brass
    Colour/surface
    Image of undefined
    Chrome plated brass

General product information

How to install this product

  1. Select Schlüter-QUADEC-MC according to tile thickness.
  2. Apply tile adhesive to the area where the tile covering will end, using a notched trowel. If QUADEC-MC is to be installed in an exterior wall corner, complete the tiling of one wall, then apply tile adhesive in the corner area of the second wall.
  3. Press the perforated anchoring leg of QUADEC-MC firmly into the adhesive and align it.
  4. Trowel additional adhesive over the perforated anchoring leg to ensure full coverage and fill the profile chamber with tile adhesive.
  5. Solidly embed adjacent tiles and adjust flush with the profile’s upper edge. Full coverage must be obtained between the tile and the profile’s anchoring leg.
  6. The tile is set to the lateral joint spacer, which creates an evenly spaced joint of 1.5 mm. In the case of stainless steel or brass profiles, a joint of approx. 1.5 mm is recommended. Fill the joint completely with grout.
  7. Use suitable materials and tools for the sensitive surfaces to avoid scratches or other damage. Setting materials must be removed immediately, especially on aluminium.
  8. Matching preformed inside and outside corner pieces are available.